
Tools & Equipment
A USEFUL CLAMP
The common clothes peg — the spring variety — makes an excellent clamp for many small jobs that have to be held while being soldered, or held while adhesive sets. It helps if the end of the peg is cut away just where the jaws curve outwards. Where the parts to be clamped are less than the normal width of the jaws, the jaws can be cut down to half the width. Similarly, they can easily be cut down to odd shapes to facilitate holding awkward parts.
TINY SMOOTH HOLES
Chuck a straight pin, sewing needle, or even a piece of strong wire in a motor tool. Expose only about 10 mm of this “bit” so it stays straight. By using the tool at low speed you get small, smooth holes in plastic, the heat of the spinning pin is what makes the hole. If you are drilling several holes, clean the bit periodically or your holes will increase in size as you work. You can use this technique to cut large holes too. Increase the speed of the tool, gently scribe the outline of the hole, then gradually cut through the plastic.
EASY CLAMP
It’s easy to devise an adjustable clamp with a rubber band and pliers. Wrapping the bands around the ends of the pliers provides the most clamp pressure; closer to the head, less pressure.
HEAT SOURCE
A small, hand held hair dryer provides a controllable, and above all, safe source of heat. Use it for working with plastic, but it can also be used to accelerate the setting of epoxies. It is also great to use for melting Woodland Scenics E-Z Water.
INEXPENSIVE LATHE
Use a quarter inch electric drill to manufacture small items such as barrels, bottles, wheels, etc. Select a round piece of sprue slightly larger than the item to be made and chuck it in the drill. Fix the drill in the vice, rotate it at high speed and use hand held tools — knife, file, sandpaper — to carve and shape the sprue. Work in short bursts to allow the sprue to cool. After achieving the desired shape, hold fine sandpaper against the turning sprue to remove scratches. Bottles shaped from clear sprue in this manner turn out amazingly clear.
SAFETY TIP
Before you throw out old hobby knife blades, wrap them with tape. Next time you rummage through the rubbish tin looking for that accidentally discarded part, you won’t cut yourself and introduce family members to some strange and unpleasant vocabulary.
PARTS PROTECTION
To protect small parts, especially plastic, when working with tweezers, wrap a small piece of masking tape around the ends. A piece of masking tape or cardboard on the jaws of your pliers and vice is also a good scratch preventative.
DRILL BIT EXTENDERS
Here’s a way to drill small holes in inaccessible spots or where an irregular surface won’t allow the drill chuck or pin vice close enough to the spot. Super glue the drill bit into tubing that has an inside diameter close to the drill size, creating an extension.
MINIATURE C-CLAMPS
Those little key ring holders with the spring-loaded clips make excellent C-clamps for holding small parts while glue sets.
CLAMPING IRREGULAR OBJECTS
When clamping irregular-shaped objects in a vice, wrap a few turns of coil solder around them. The vice grips the solder and the solder grips the work.
RECYCLED SPOONS
The small plastic spoons you get with KFC and other takeaway meals, plastic scoops in soap powder, plastic coffee stirrers and other plastic throwaway tools should not be thrown away. They can be used for measuring plaster, mixing paint, cleaning small parts and a host of other jobs in the modeller’s workshop. Saves on the good kitchen cutlery too.
PARTS’ HOLDER
Make small parts’ holders out of alligator clips obtainable from your electronics supply shop. Push a clip onto the end of a meat skewer or other suitable piece of dowel and sharpen the other end so you can stick it in a block of polystyrene to dry after painting or just so you can see it for assembly.
CLOTHES PEG PARTS HOLDER
You can modify clothes pegs so they can be used to hold small parts for painting. Cut the jaws on ones that have flat surfaces so that the jaws come to a point.
CLOTHES PEG CLAMP
A slight modification of a standard spring-type peg makes a great clamp. Simply reassemble the peg as shown. To prevent it slipping off tapered surfaces, glue thin strips of foam rubber to the clamping sides.
MORE ON CLOTHES PEGS
Use spring-type clothes pegs for clamps by modifying two pegs and three springs as shown. The peg in the centre grips small assemblies, while the outer set can handle big jobs.
CLOTHES PEG CLAMPS
Reversing the springs on some clothes pegs is an old trick for making modelling clamps, but here is a new twist. Modify the ends so that they will fit more easily around details. Making several sets ensures that you will always have the shape you need on hand.
HAUNT THE SALES
Garage sales and flea markets are a great source of bits and pieces for modellers. Small sieves for sifting grass and dirt, cheap brushes for weathering and applying pastels or glue, wire, plugs and other parts from old electrical appliances, dental tools for scribing, tools like files and snips...and best of all its cheap. Modellers have also even been known to pick up out of production railroad equipment at very good prices. One man’s trash can be your treasure.
SANDING STICKS
A good source of sanding sticks in varying sizes is the nail filing section in chemist shops.
SHAVING BRUSH DUSTER
An old-fashioned shaving brush makes a dandy model duster. It is soft and won’t scratch clear plastic windows or decals. A camera lens brush also has similar properties and is a useful tool to have on the model bench.
CLOSE-QUARTERS SANDER
This tool works when nothing else will reach what you want to sand. Slice off both ends of a pencil to give a flat surface, punch out quarter inch discs of 220 and 400 grit sandpaper and superglue these to either end of the pencil. To sand, twirl the sanding stick in your fingers or chuck it up in a motor tool or variable speed drill. To replace a disc, cut it off with a hobby knife and glue on a new one.
PROLONGING BLADE LIFE
If you prefer the blade in your hobby knife to be new, or nearly new and sharp but you find yourself using the thing for all sorts of operations which quickly dull the blade, try this idea. Keep two different hobby knives on your workbench — one with an old blade and one with a new blade. Use the old blade for scraping, opening paint tins, and all the other things you do that don’t require surgical sharpness. Use the new blade where it should be used and identify it in some way — paint the handle a different colour perhaps — and when it does get a little dull, put a new blade in and transfer the dull one to the old holder. Throw the very old one away, carefully wrapped of course.
DRILL SALVAGE
Small drills, especially those below 2mm diameter have a nasty habit of breaking. This causes consternation, particularly at current prices, if it happens when you have not got another and the shops are not open to buy one. They can be salvaged by grinding a new cutting head, not on a power grindstone, but on an oilstone slip. Hold the drill in a pin chuck and gently shape the tip to the following form:- Try to get the profile of the original drill and to get the point in the centre. You may need a magnifying glass. Naturally you won’t succeed completely and it won’t be as good as the original, but it will drill — it will make a hole slightly oversize, so to get an exact size hole you may need to drill a pilot hole first with a smaller bit. Then you can use your salvaged bit to finish off. It won’t matter then that the point is off centre and it will also cut down the effort involved.
MOTOR TOOL LATHE
If you don’t have access to a lathe, you can use your motor tool or variable speed electric drill and achieve good results. Place the material — wood, plastic, metal rod — you want to turn in the chuck of your tool or drill, fix it in a vice or drill press so you have both hands free and switch on. Depending on the material you are turning, use a file or wood turning chisel to shape the object of your choice. A little experimentation will be needed to obtain the most desirable speed and make sure that you wear safety glasses.
RE-PURPOSED ELECTRIC ORBITAL SANDER
An electric toothbrush can be converted into a small oscillating cordless sander. Remove the bristles from a worn out toothbrush head and attach a small disc of sandpaper with double sided tape. Now you have a sander that can reach into those small places.
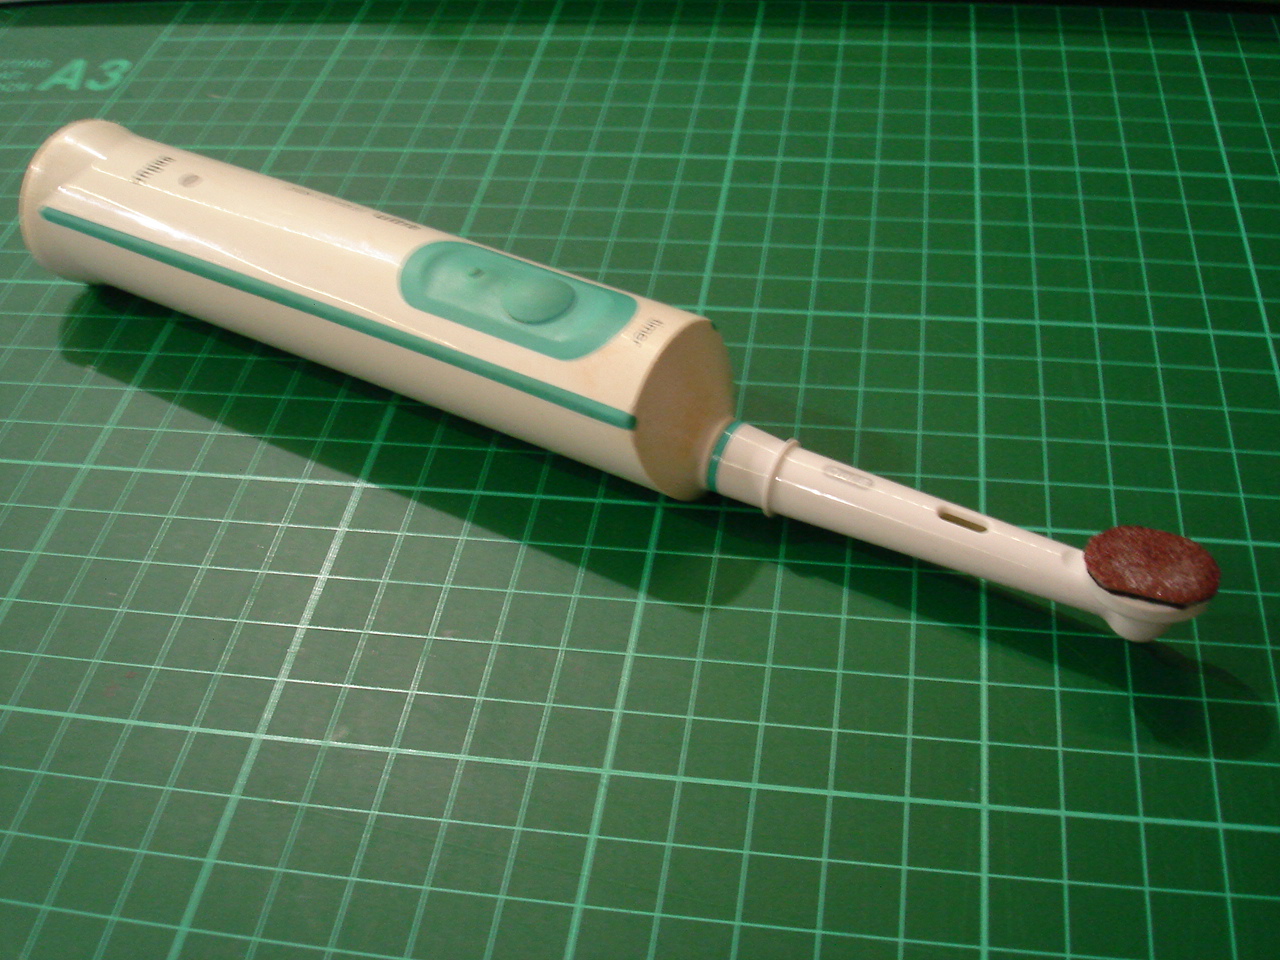 |
| Re-purposed electric orbital sander |
FILM CANISTER STORAGE
Here is yet another use for old film canisters. Used, and new, scalpel blade can be stored safely (or disposed of) without the risk of cut fingers from loosely accumulated blades.
AWL HELPS DRILLING
If you have trouble drilling holes in the exact place, you need to pinpoint the spot with an awl. The small depression made by the point of the awl will give your drill a start in the precise spot without moving off to the side when you start to drill. To make an awl, insert a large steel sewing needle into a length of styrene tubing and fix it with gap-filling super glue. To prevent pricked fingers when searching for it on the workbench, place a cork over the point of the needle.
NUTCRACKER OPENER
Having trouble opening small screw-type lids on paint jars? Try using a nut cracker from the kitchen cutlery drawer. There are not too many small lids it won’t loosen for you.
CLEANING FILES
All files need cleaning from time to time. They get clogged with resin, putty, plastic, solder and whatever else you have been filing. Try chucking a wire brush wheel in you motor tool and run the wheel up an down the files. They will be cleaned in no time and work like new again.
CRAFT KNIFE SAFETY
Your craft knife is a dangerous instrument and should not be left on the workbench, or anywhere for that matter, without some protection on the blade. A simple and cheap way of adding a protective cap to the blade is to stick it into the end of a wine bottle cork. For added safety, slice one side of the cork to give a flat surface which will prevent the knife and cork rolling off your workbench.
LOOK AROUND THE HOME
Items useful to modellers can be found in many places around the home. Wives, mothers, sisters, daughters —all have useful items in the kitchen cupboards, sewing baskets, makeup kits, accessory collections — that can be put to good use on, or for the layout. Here are a few suggestions.
SPRING LOADED HAIR CLIPS
These useful items can be utilised as modelling clamps for small jobs. They can easily be bent to fit around specific parts while the spring is strong enough to prevent the components from coming apart while the glue is setting. This particular brand is available from chemists at $1.95 for a card of four.
NAIL VARNISH REMOVER
Great stuff for dissolving super glue. Keep a small bottle of it handy on the workbench for those occasions when you get glue on your fingers. Acetone is also a good debonder for super glue.
TAILOR’S PUNCH
This punch, which is also used by leather workers, has a variety of different sized punch holes. You can use it for making a hole of the size you want in card or styrene models. Another use is to make small disks for any number of applications in modelling. Simply punch a hole of the required size and then poke out the resulting disk from the cutting tube.
HAIR DRYER
Many modelling applications can be found for this tool. Use it to add ripples or repair scratches in Woodland Scenics E-Z Water, soften plastic to bend or straighten bent parts, quickly dry paint or glue and a host of other uses.
RUBBER GLOVES
Also from the kitchen cupboard, you can “borrow” the washing up rubber gloves when you need protection for the hands. The bathroom cabinet may also provide you with the thinner disposable variety when you need to have some sensitivity in your fingers for that delicate modelling job.
NECKLACE CHAIN
These make great chains for tying down loads on trucks and wagons. They come in all sizes and some are especially fine for the smaller scales. Logs, pipes, crates and even vehicles can all be secured using these chains from discarded neck jewellery, usually because of a broken clasp.
PINKING SHEARS
The inventive modeller can always find a use for most things and pinking shears can be used to cut very realistic valances for platform roof canopies on those British railway stations and other places where a valance adds to the atmosphere such as café awnings and the like.
TALCUM POWDER FILLER
To fill seams, cracks and holes in construction kits, use a mix of super glue and talcum powder. Mix equal parts to the consistency of toothpaste and this will give you a couple of minutes of working time. It does not become hard and brittle even after several days of curing and can be easily carved, shaped and sanded. Mix only as much as you need and within 5 to 10 minutes of application you can start sanding or cutting.
MAKEUP BRUSHES
Besides eye shadow, mascara and other such items from a makeup kit for weathering, the appropriate brushes can all be put to good use for dusting as well as weathering equipment. The blusher is fairly large, but amazingly soft, and is ideal for general dusting of roofs, boilers and tenders. It removes the dust with no damage to finish or detail. The lip brush is fine and stiff, just the thing to reach into restricted places such as pilot decks, caboose platforms and other tight spots. It is also good for applying dry colour or eyeshadow weathering. If you don’t have these items around the home, try the Avon Lady or the makeup department at your chemist or department store.
USEFUL NAMEPLATES
Save those name plates that get issued to you at courses, seminars and conferences. Some of them have a neat little clip on the back which can make a really useful clamp when gluing small parts together. The plastic sleeve is also useful for glass in windows of buildings, passenger carriages or anywhere else you want to simulate glass windows. Use Microscale’s Micro Kristal Klear to fix the windows in place and not superglue or similar to avoid crazing of the clear plastic.
OVEN CLEANER
The kitchen, too, is another good place to find useful modelling materials. Oven cleaner does a great job of stripping old paint off models, especially metal ones. Always test a small spot first, especially on plastic, and make sure you wear rubber gloves and safety glasses when working with the stuff.
DRILLING HARD-TO-REACH HOLES
When your electric drill is too big and your pin vise is not suitable, remove and save the rotating head and retaining clips then mount the pin vise in the drill chuck. This will give you the extra length to reach down inside your model or assembly to drill fine size holes.
MOTOR TOOL BIT REMOVAL
When you use a Dremel-type motor tool, removing an attachment from the collet is usually harder than inserting it — they seem to grab after use. By first pushing in on the bit, it will come free more easily.
PADDLE UNCOUPLER
To build a paddle un-coupler for Hornby type uncouplings, all you need is a small rectangle of plastic card about 10mm by 20mm and a piece of scrap plastic sprue for the handle. The exact measurements are not critical as long as the paddle fits between two wagons and lifts the dropper bars of both couplings simultaneously. The diagram shows how to fit the paddle together
TRACK LAYING HELPER
When hand laying track, use an open wagon to hold the spikes or track pins. In addition to keeping them handy to your work, this tip also enables you to have a test car at the ready. You could also use wagons to carry the ballast to the newly laid track.
SAW PROTECTION
To keep your razor saw teeth sharp and in good condition while the saw is in a drawer or storage box, slit a plastic drinking straw down its length and fit it over the saw blade. A small rubber band will help to keep the straw in place when you rummage around in the container looking for other tools. This protection also saves you getting cuts or scratches on your hand.
STOCK UP
Keep a stock of spares such as cutting discs, rail joiners, track pins, craft knife blades and other often used items. You will run out when the model shop is closed, guaranteed.
STOP ROLLING
Round handles on tools tend to roll when put down on the workbench. To stop these tools rolling off your bench, tape a spent matchstick or piece of sprue to the round handle.
SMALL SANDER
Ever tried sanding in a narrow space you can’t get your finger into? Cut a very narrow strip of sandpaper about 25 mm long, fold it over lengthwise and insert it into the end of a slide-locking tweezers with about 3-4mm left protruding and proceed to sand. When the sandpaper is worn, make a new fold or cut a new piece of sandpaper.
CLOGGED FILES
Modelling files need cleaning from time to time to retain their efficiency. Soak clogged files in lacquer thinner to dissolve plastic and filler dust then give them a good rubbing with a brass wire brush.
MAGNETS
Magnets can be used for a number of applications on the layout where you don’t want a part to be permanently fixed but want it to stay in place temporarily. Take carriage roofs for example. Adding or changing passengers from time to time is easy with the roof held by a magnet. A strip of thin tinplate glued to the inside of the plastic roof and also to the interior of the carriage in an inconspicuous place such as the toilet or compartment top is all that is needed. The magnet, which can be as thin as a business card, sits between these strips of tinplate. It then holds the roof in place and can be easily prided off when you want to place a bulb or change some passengers inside.
DRILLING HOLES SQUARE
Those of us not blessed with a good straight eye are always in trouble trying to drill holes that don’t run off at an angle. This is where small set squares and spirit levels come in handy if your drill does not have a built-in spirit level. Use a set square or spirit level to keep the drill square to the surface to be drilled
KNIFE PROTECTION
When using a cutting knife with a curved blade, there is a good chance of cutting yourself as only the curved end of the blade is used. There is approximately 20mm of very sharp steel exposed in close proximity to your finger. To protect this unused part of the blade, and your finger, wrap a length of masking tape, as shown in the sketch, around the blade. Leave the masking tape a little loose to pinch it against the sides of the blade so that there is a small gap between the tape and the sharp edge. Never push the tape against the sharp edge.
ASSEMBLY OF SMALL NUTS - 1
Screwing small nuts onto bolts in tight places is always a problem, especially for those with clumsy fingers. Try using small self adhesive labels. Peel one off its backing sheet and place the nut on it with its thread at right angles to the paper. The adhesive backing will hold the nut firmly in place enabling the bolt to be positioned and screwed in with a minimum of hassle.
ASSEMBLY OF SMALL NUTS - 2
Older modellers, as well as those with clumsy fingers, also find screwing small nuts onto bolts a problem. Another solution is to use the end of a small paint brush. Simply trim the end to fit and push on the nut. Then it is a simple matter to locate the bolt and screw by turning the handle of the brush.
GOOD FILES ARE A MUST FOR RESIN
Resin is a material almost tailor-made for filing so it is important, if you plan to make up a few models in this material, to have a good set of files. a needle file is one of the most versatile tools for a scale modeller but in your collection should be round, half round, flat, square and triangular files.
LIGHTWEIGHT VACUUM HOSE
A length of flexible garden hose simply duck-taped into the household vacuum nozzle is much more easy to use around the relatively delicate confines of a layout. Tape a piece of pantyhose over the business end to keep small parts from disappearing up the tube then proceed to vacuum the dust from your layout.
IMPROVING CLOTHES PEG CLAMPS
Spring-loaded clothes pegs are a handy tool on the workbench. But their ridged gripping surfaces need to be modified. Cut or file the ridges off to leave a flat surface and then cover these flat surfaces with rubber sheet such as squares cut from an old cycle tube or similar. These patches can be glued on with super-glue and make the clamp much more useful for gripping parts of models during assembly.
SAFEGUARD SMALL DRILL BITS
Do you have trouble with very fine drill bits breaking? Then when you insert one of these small bits into the chuck of your pin vise, only leave a very minimum length of the bit showing. You probably don’t need the whole length of the bit to drill through whatever it is you want to make the hole in so only leave showing enough to do the job. Exposing more of the bit than you need only increases the chance of it breaking.
DENTISTS’ TOOLS
Dentists have an assortment of tools which are great for modelling. Make friends with your dentist and persuade him not to throw out any of his picks and scrapers he is finished with. You can certainly find a use for them on your workbench.
SAFER DRILLING
The hardest thing about drilling a hole into plastic is when the drill bit slips and ruins the model’s surface. Insert a sewing machine needle into the chuck of your motor tool or drill, press the point of the needle into the plastic where you want the hole and proceed to drill. The spinning needle will create a pilot hole for a regular drill bit. If you have a high-speed drill, the needle point will melt the plastic and create a hole exactly where you want it.
INEXPENSIVE CLAMPS
Clothes pegs are a very useful tool to have around your workbench. They make great assembly clamps but sometimes they don’t grip as well as you would like. Answer, glue pads of 400-grit sandpaper to the inside jaws. On some of the plastic types you may need to file off the ridges on the jaws to obtain a flat surface. The sandpaper gives the pegs a little extra grip to keep them from slipping off smooth or curved surfaces.
PAINT YOUR TWEEZERS
Here is one way to help eliminate nicks and scratches the next time you are handling pre-painted, photo-etched parts with your tweezers. Just dip your tweezers tips in the paint colour of the pre-painted parts and let them dry thoroughly. Now, when you use the tweezers to handle or bend the parts, the paint will help hold and cushion the part. It will not totally eliminate the possibility of nicks and scratches, but it should help. When you are finished, soak the painted tips of the tweezers in solvent, gently scrape the paint off and your are ready for the next colour.
TOOTHBRUSH SANDER
A great oscillating sander can be made from an electric toothbrush. Simply shave the bristles off the brush’s oscillating hub and add a self-adhesive Velcro dot (the ‘hook’ side) in their place on the hub. Make round sanding pads by gluing sandpaper to a disc cut from sheet styrene and add the ‘loop’ half of the Velcro on the back of the styrene sanding pads. This makes it easy to change pads but they will still stay securely in place when in use. The sandpaper pad will bend into tight contours, yet stay rigid and flat on broad surfaces. This electric toothbrush sander eliminates hours of sanding and is precise.
FILE CLEANUP
Try soaking your clogged-up files in liquid cement and scrubbing them with an old toothbrush. They will come out as good as new.
CORRECT CLOTHING
When working on your railroad, make sure you wear the appropriate clothing for the job in hand. Faded and ripped jeans and old baggy T-shirt are ideal for painting or staining but not the gear when using power tools. Loose fitting or torn clothing can very quickly find their way into moving parts on electric saws and drills.
FINE DRILLING AID
When using a pin vise to drill such metals as lead or white metal castings with very fine bits, the soft metal will tend to grab the bit and even break it. To help alleviate this problem, dip the end of the drill bit into a drop of dishwashing liquid before starting to drill.
HOMEMADE TRAMMEL
An effective trammel for drawing out curves on your layout baseboard is to use a metre rule or yard stick with a pencil or pen clamped on one end and a nail protruding from a block of wood clamped to the other end. Adjust the radius you need by sliding the pencil along the rule to the required measurement and scribe the arc.
STICK IT
Use hot-melt glue sticks for those tricky jobs. Sculpt them with a hobby knife into points or chisel shapes for applying filler putty. They are firm yet flexible enough to reach these tight spaces, and if you bond sandpaper to them, you can get into areas that are otherwise impossible to sand. They also make great burnishing tools for masking tape or Bare-Metal Foil.
PIZZA SCORER
Scoring sheet styrene is easy with the help of a pizza cutting wheel. Just line up your steel straightedge where you want to score the line, run the wheel along with a light pressure and break off the part. Easy, peasy.
DRAWING LINES
When drawing plans for layouts or rolling stock, draw curved lines first when straight lines need to be added to curves ones. It is much easier to add a straight line to a curved one rather than the other way around.
SELF-PROPELLED DEPTH GAUGE
When drilling small holes to a set depth, use a propelling pencil as a depth gauge. Insert some wire into the pencil instead of the lead, set it to the depth required and use the pencil tip as a reference point to measure the desired depth of the hole.
CUSTOM CLAMPS
If you never have enough clamps around the workbench, or your standard C-clamps do not fit where you want them, try making this simple device. Simply cut two pieces of timber strips to a convenient size and drill matched holes through the ends. Insert a carriage bolt through each hole and add a wing nut. The timber strips may be notched or shaped for special shapes. Wider clamps can, of course, be made by simply lengthening the timber strips and adding more holes for coach bolts.
No comments:
Post a Comment